

There’s something magical about biting into a perfectly crafted strawberry mochi. That soft, chewy exterior gives way to a burst of creamy, fruity goodness – it’s pure bliss in every bite! 😊 If you’ve ever wondered how to recreate this beloved Japanese treat in your kitchen, you’re in for a delightful adventure.
What Makes Strawberry Mochi So Special?
Strawberry mochi represents the perfect marriage of traditional Japanese confectionery techniques with the universally loved flavor of fresh strawberries. This delicate dessert combines the satisfying chewiness of glutinous rice flour with a luscious cream filling that melts beautifully on your tongue. The result? A treat that’s both comforting and exciting, familiar yet exotic.
The beauty of homemade strawberry mochi lies in its incredible taste and the meditative process of creating something so special with your own hands. There’s a certain pride that comes with mastering this traditional technique, and trust me, your friends and family will be amazed! 💕
Understanding the Art of Mochi Making
Before we dive into our strawberry mochi recipe, let’s talk about what makes mochi so unique. The secret lies in glutinous rice flour (also called sweet rice flour), which creates that signature stretchy, chewy texture we all love. Don’t worry if you’re new to working with this ingredient – it’s much more forgiving than you might think!
The key to perfect strawberry mochi is achieving the right balance between the wrapper and filling. You want that beautiful pink-tinted exterior to be soft and pliable, while the strawberry cream filling should be rich, smooth, and bursting with flavor.
Essential Ingredients for Your Strawberry Mochi
Let me walk you through each component that makes this strawberry mochi recipe so special:
For the Mochi Wrapper:
- 100g glutinous rice flour (this is your star ingredient!)
- 30g corn starch for that perfect texture
- 35g sugar to add just the right sweetness
- 180ml milk for creaminess and moisture
- 2-3 drops strawberry food coloring for that gorgeous pink hue
- 15g butter to make everything silky smooth
For the Strawberry Cream Filling:
- 150ml non-dairy whipping cream
- 50ml dairy whipping cream for extra richness
- 1-2 tablespoons condensed milk for sweetness
- 3 tablespoons strawberry puree for that authentic berry flavor
Step-by-Step Guide to Strawberry Mochi Perfection
Preparing Your Mochi Base
The foundation of great strawberry mochi starts with properly mixing your dry and wet ingredients. In a microwave-safe bowl, combine your glutinous rice flour, sugar, milk, and those precious drops of strawberry food coloring. Take your time here – you want everything dissolved completely with no lumps hiding anywhere!
Stir with purpose and patience. This isn’t a race, and your strawberry mochi will thank you for the extra attention to detail. Once everything is beautifully combined, cover that bowl with plastic wrap like you’re tucking it in for a cozy nap.
The Steaming Process
Here’s where the magic really begins! Steam your mixture for about 20 minutes, or until the dough transforms into something almost translucent – it’s quite mesmerizing to watch. You’ll know it’s ready when it has that characteristic glossy appearance that makes mochi so irresistible.
Once steamed, add your butter and mix until the dough becomes one cohesive, happy family. This is where you’ll really start to see (and feel) that signature mochi texture developing. Knead it gently but thoroughly until it becomes soft and beautifully stretchy. Then, let it cool for about 45 minutes – patience is truly a virtue in strawberry mochi making! ⏰
Creating the Perfect Strawberry Filling
While your mochi dough is cooling, let’s create that dreamy strawberry cream filling. Combine your non-dairy whipping cream, dairy whipping cream, condensed milk, and strawberry puree in a mixing bowl. Using a hand mixer, whip everything together until you achieve stiff peaks.
The aroma alone will have you dreaming of strawberry fields! This filling is what transforms ordinary mochi into something extraordinary – that burst of creamy, fruity goodness that makes each bite of strawberry mochi so memorable.
Assembly: Where Art Meets Technique
Now comes the fun part – assembling your strawberry mochi! Dust your work surface and the cooled dough generously with cooked glutinous rice flour. This prevents sticking and makes handling so much easier.
Gently flatten each portion of the dough into a circular shape. Think of yourself as a mochi artist, creating the perfect canvas for your strawberry masterpiece! Pipe your prepared filling right into the center – be generous but not overly so. You want enough filling to make each bite spectacular without overwhelming the delicate mochi wrapper.
Here’s where technique matters: pinch the four corners of your mochi wrapper first, then carefully bring together the remaining edges. It’s like wrapping a precious gift – which, in a way, you absolutely are! 🎁
The Finishing Touches
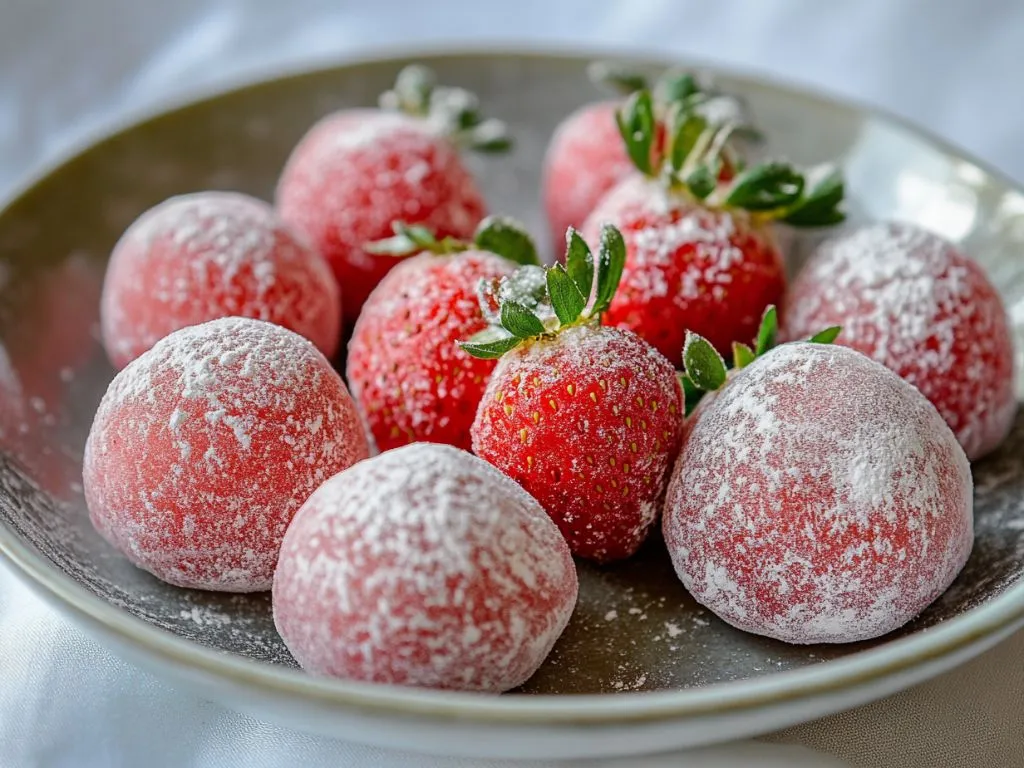
Give the bottom of each strawberry mochi a gentle tap with some cooked glutinous rice flour or cornstarch. This prevents sticking and gives your finished treats a professional appearance. Finally, use a soft brush to gently remove any excess flour – you want your strawberry mochi to look as beautiful as they taste.
Tips for Strawberry Mochi Success
The difference between good and extraordinary strawberry mochi often lies in the details. Make sure your filling is properly chilled before assembly – this makes wrapping so much easier and prevents messy situations. Don’t rush the cooling process for your mochi dough; patience here pays dividends in texture and workability.
When working with the dough, keep your hands slightly damp to prevent sticking. And remember, practice makes perfect! Your first batch of strawberry mochi might not look like they belong in a fancy Japanese confectionery, but they’ll still taste absolutely incredible.
Storing and Enjoying Your Homemade Strawberry Mochi
Fresh strawberry mochi is best enjoyed within a day or two of making. Store them in the refrigerator, but let them come to room temperature for about 10-15 minutes before serving – this brings out the best in both texture and flavor.
These delightful treats make wonderful gifts, special occasion desserts, or simply a sweet way to brighten an ordinary day. There’s something so satisfying about creating these little parcels of joy from scratch!
The Joy of Homemade Strawberry Mochi
Making strawberry mochi at home is more than just following a recipe – it’s about connecting with a beautiful culinary tradition while creating something uniquely yours. Each batch teaches you something new, and before you know it, you’ll be adjusting flavors and perfecting techniques like a true mochi artisan.
The next time you’re craving something special, remember that perfect strawberry mochi is just a few simple ingredients and some loving attention away. Your kitchen will smell amazing, your hands will learn a new skill, and your taste buds will thank you for the incredible journey!
So go ahead, gather your ingredients, and embark on this delightful strawberry mochi adventure. Trust me – once you taste that first bite of your homemade creation, you’ll understand why this humble Japanese treat has captured hearts (and taste buds) around the world! 🌸✨